Blog/Tutorials

 RSS Feed

Category: Free Motion Quilting with Templates and Rulers

  1. More on Free Motion Quilting with a 1/4" Ruler Foot and Templates

    Posted on

    Since posting my first blog at the beginning of May on Free Motion Quilting using a 1/4" ruler foot and templates, I have taken delivery of a rather wonderful custom-made extra-large extension table to fit my Janome Atelier 5 machine.  When I bought the Quilting Accessories Kit for the Atelier 5 it came with an extension table I found that the table works very well with smaller quilting pieces.  My new super-duper extra-large extension table works extremely well with larger pieces.  When I say it is large, it is large.  It measures 24" x 24" or 61 cms x 61 cms.  Here is an image of my beauty!
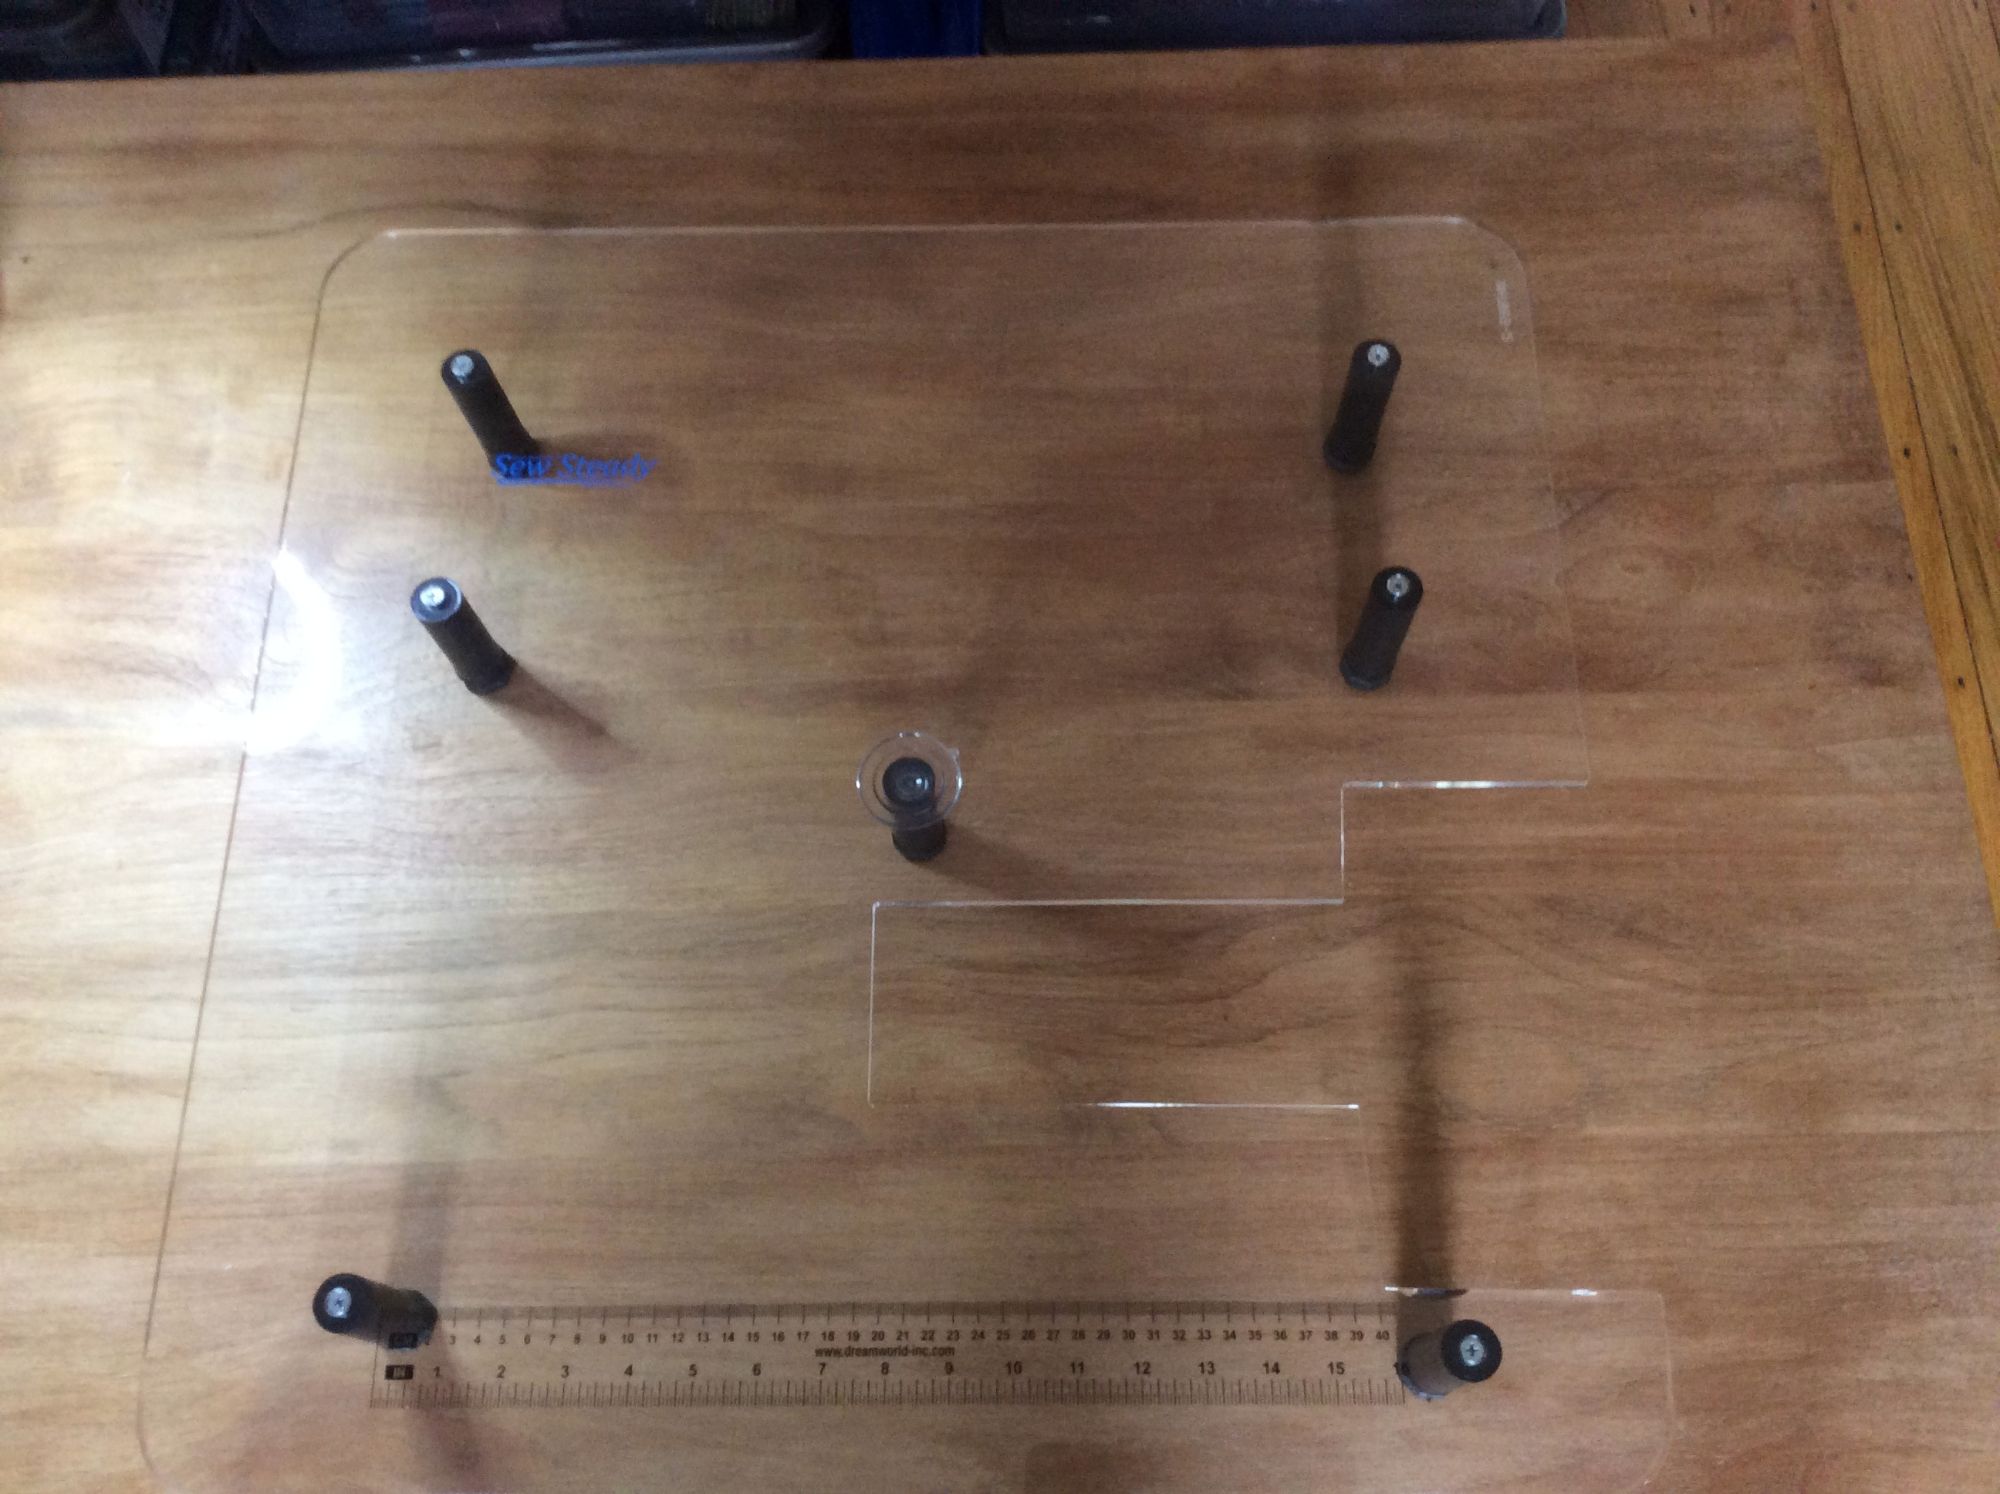
    Image 4

    You can see from the image below how much space there is behind the machine:
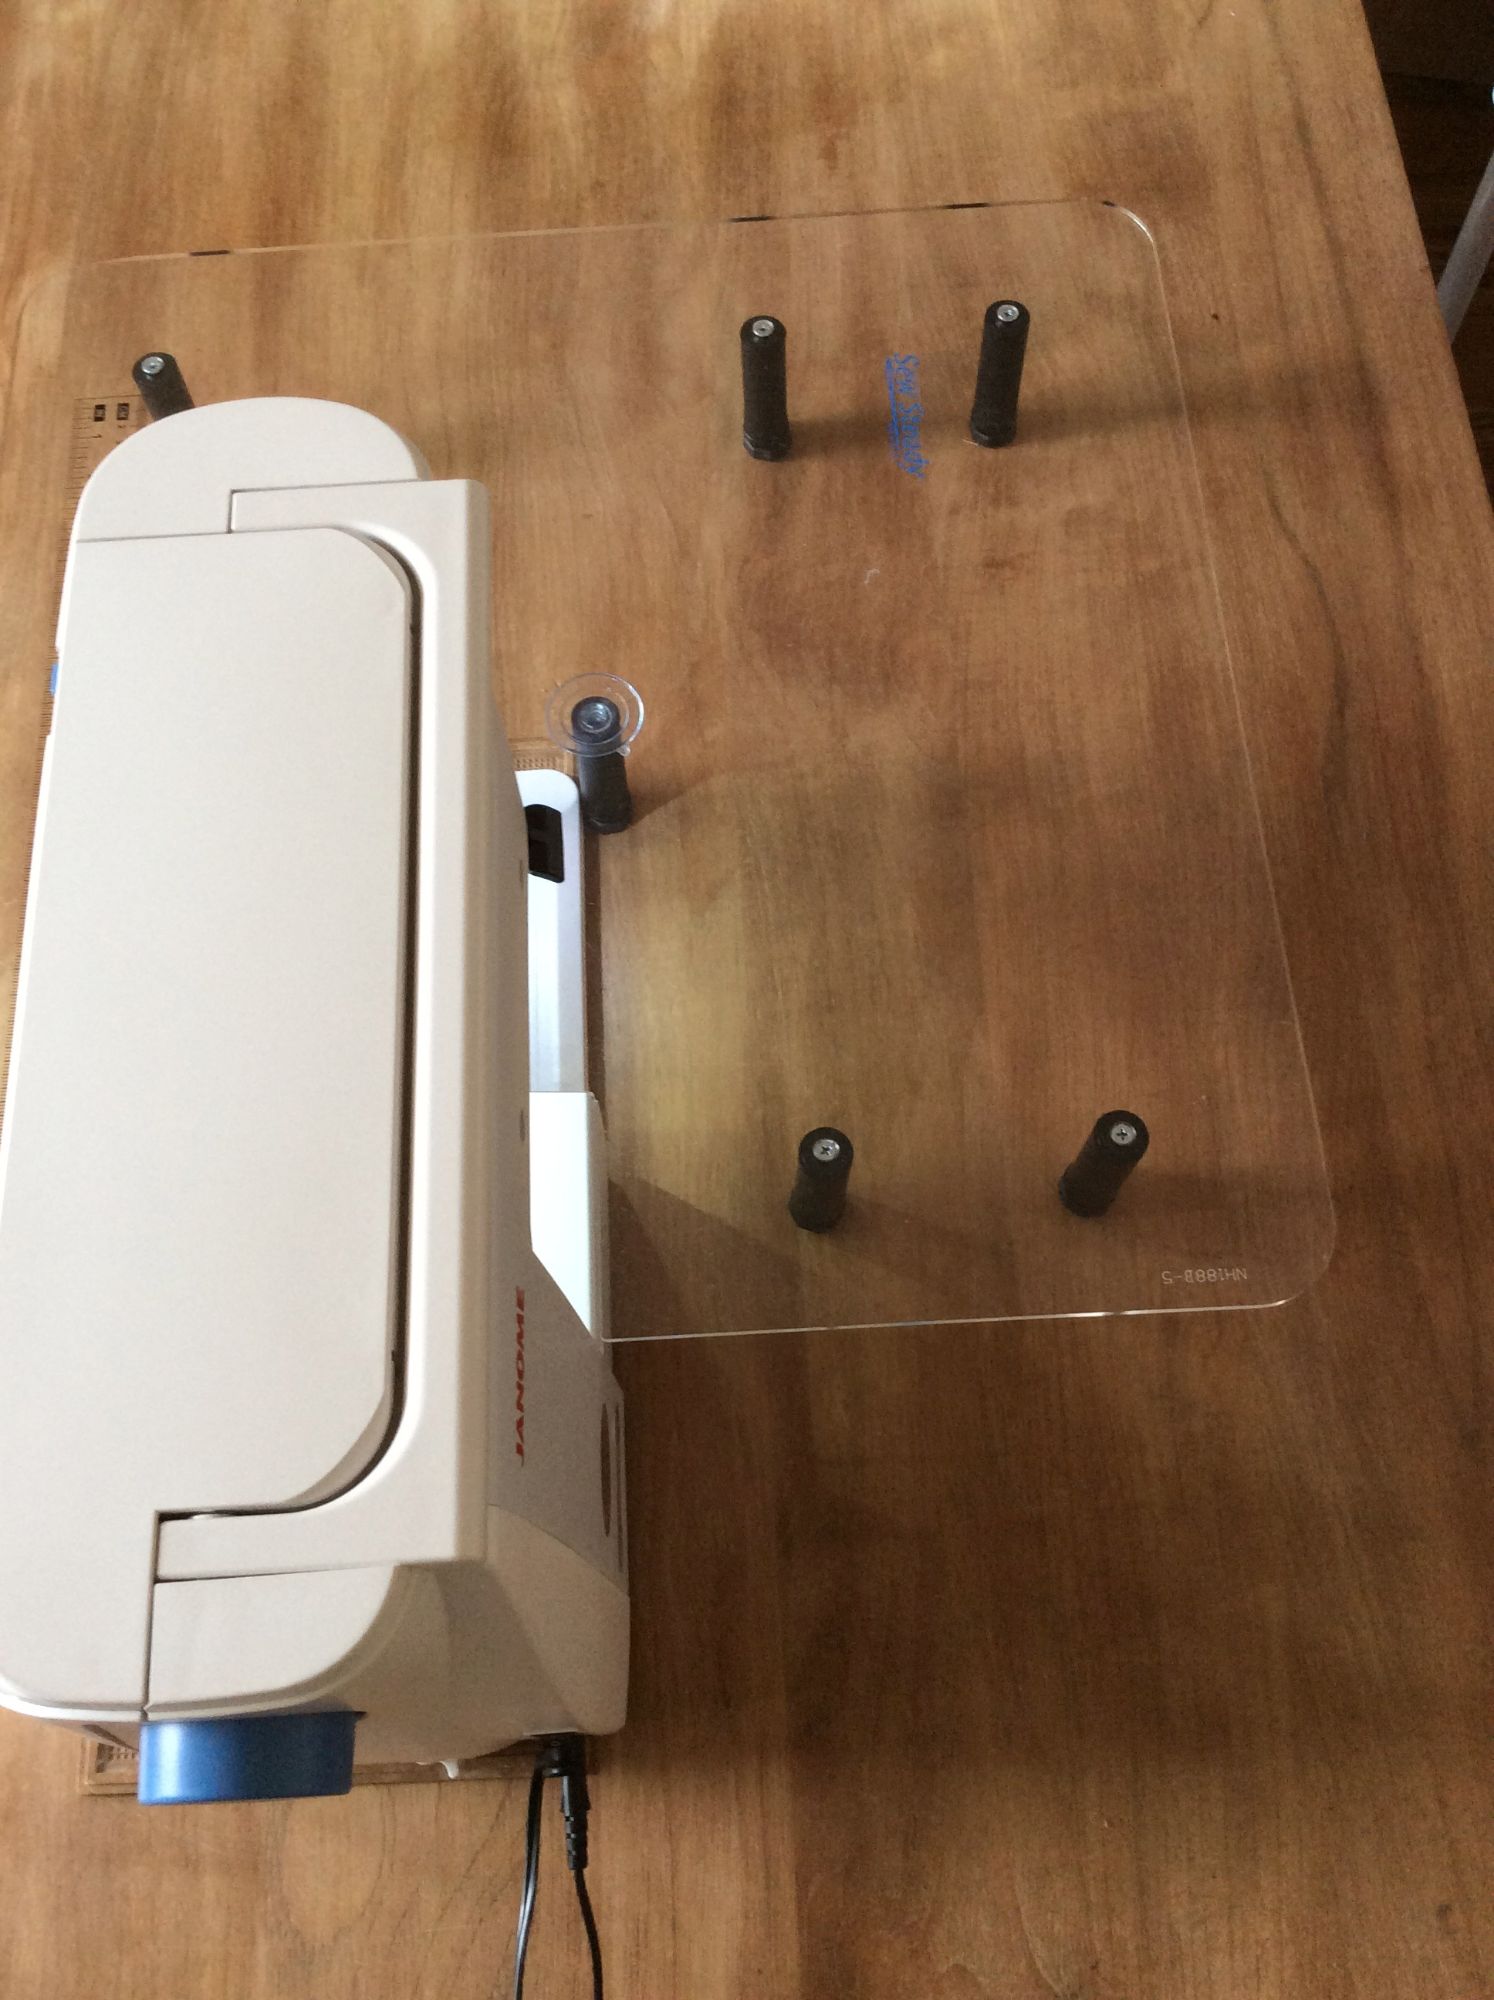
     

    Image 6

    I've been using (or rather practising) with some templates, mainly the Serpentine, the Clamshell and the 4" Arc
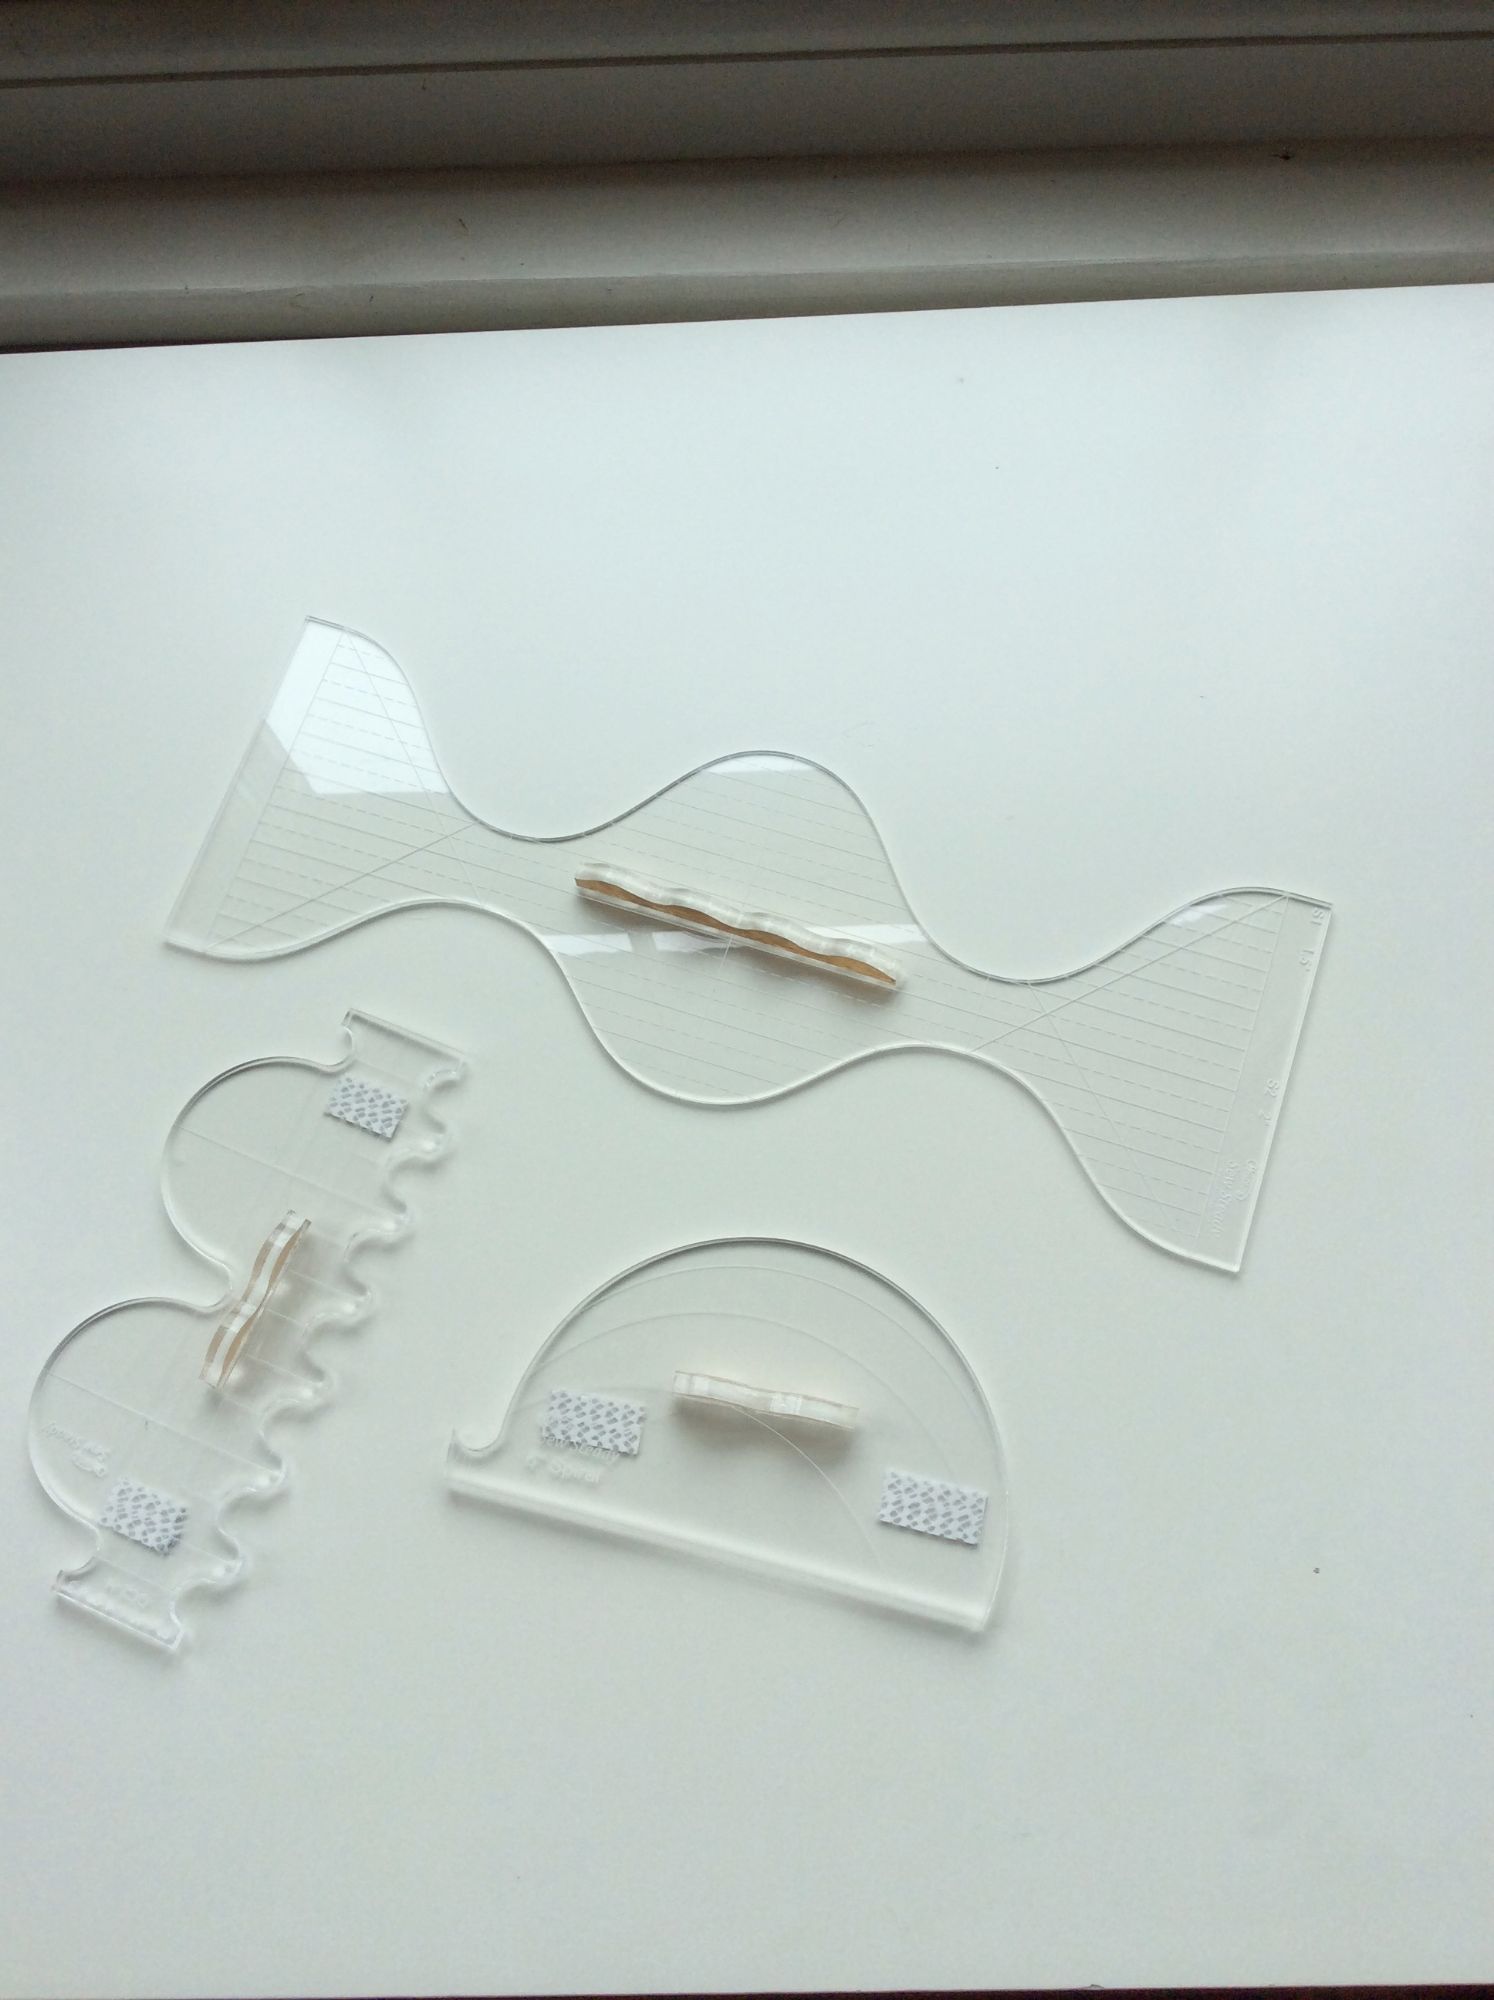
    Image 2

    You'll notice that there are handles on the templates above.  These need to be bought separately but the good news is that you can adhere the handles anywhere you want to put them on your templates.  As a beginner to FMQ with templates I have found the handles really useful and the grip I have is better which also gives me better control when I'm FMQ.  This is just personal preference and by no means essential and it may be that with more experience I won't need the handles. 

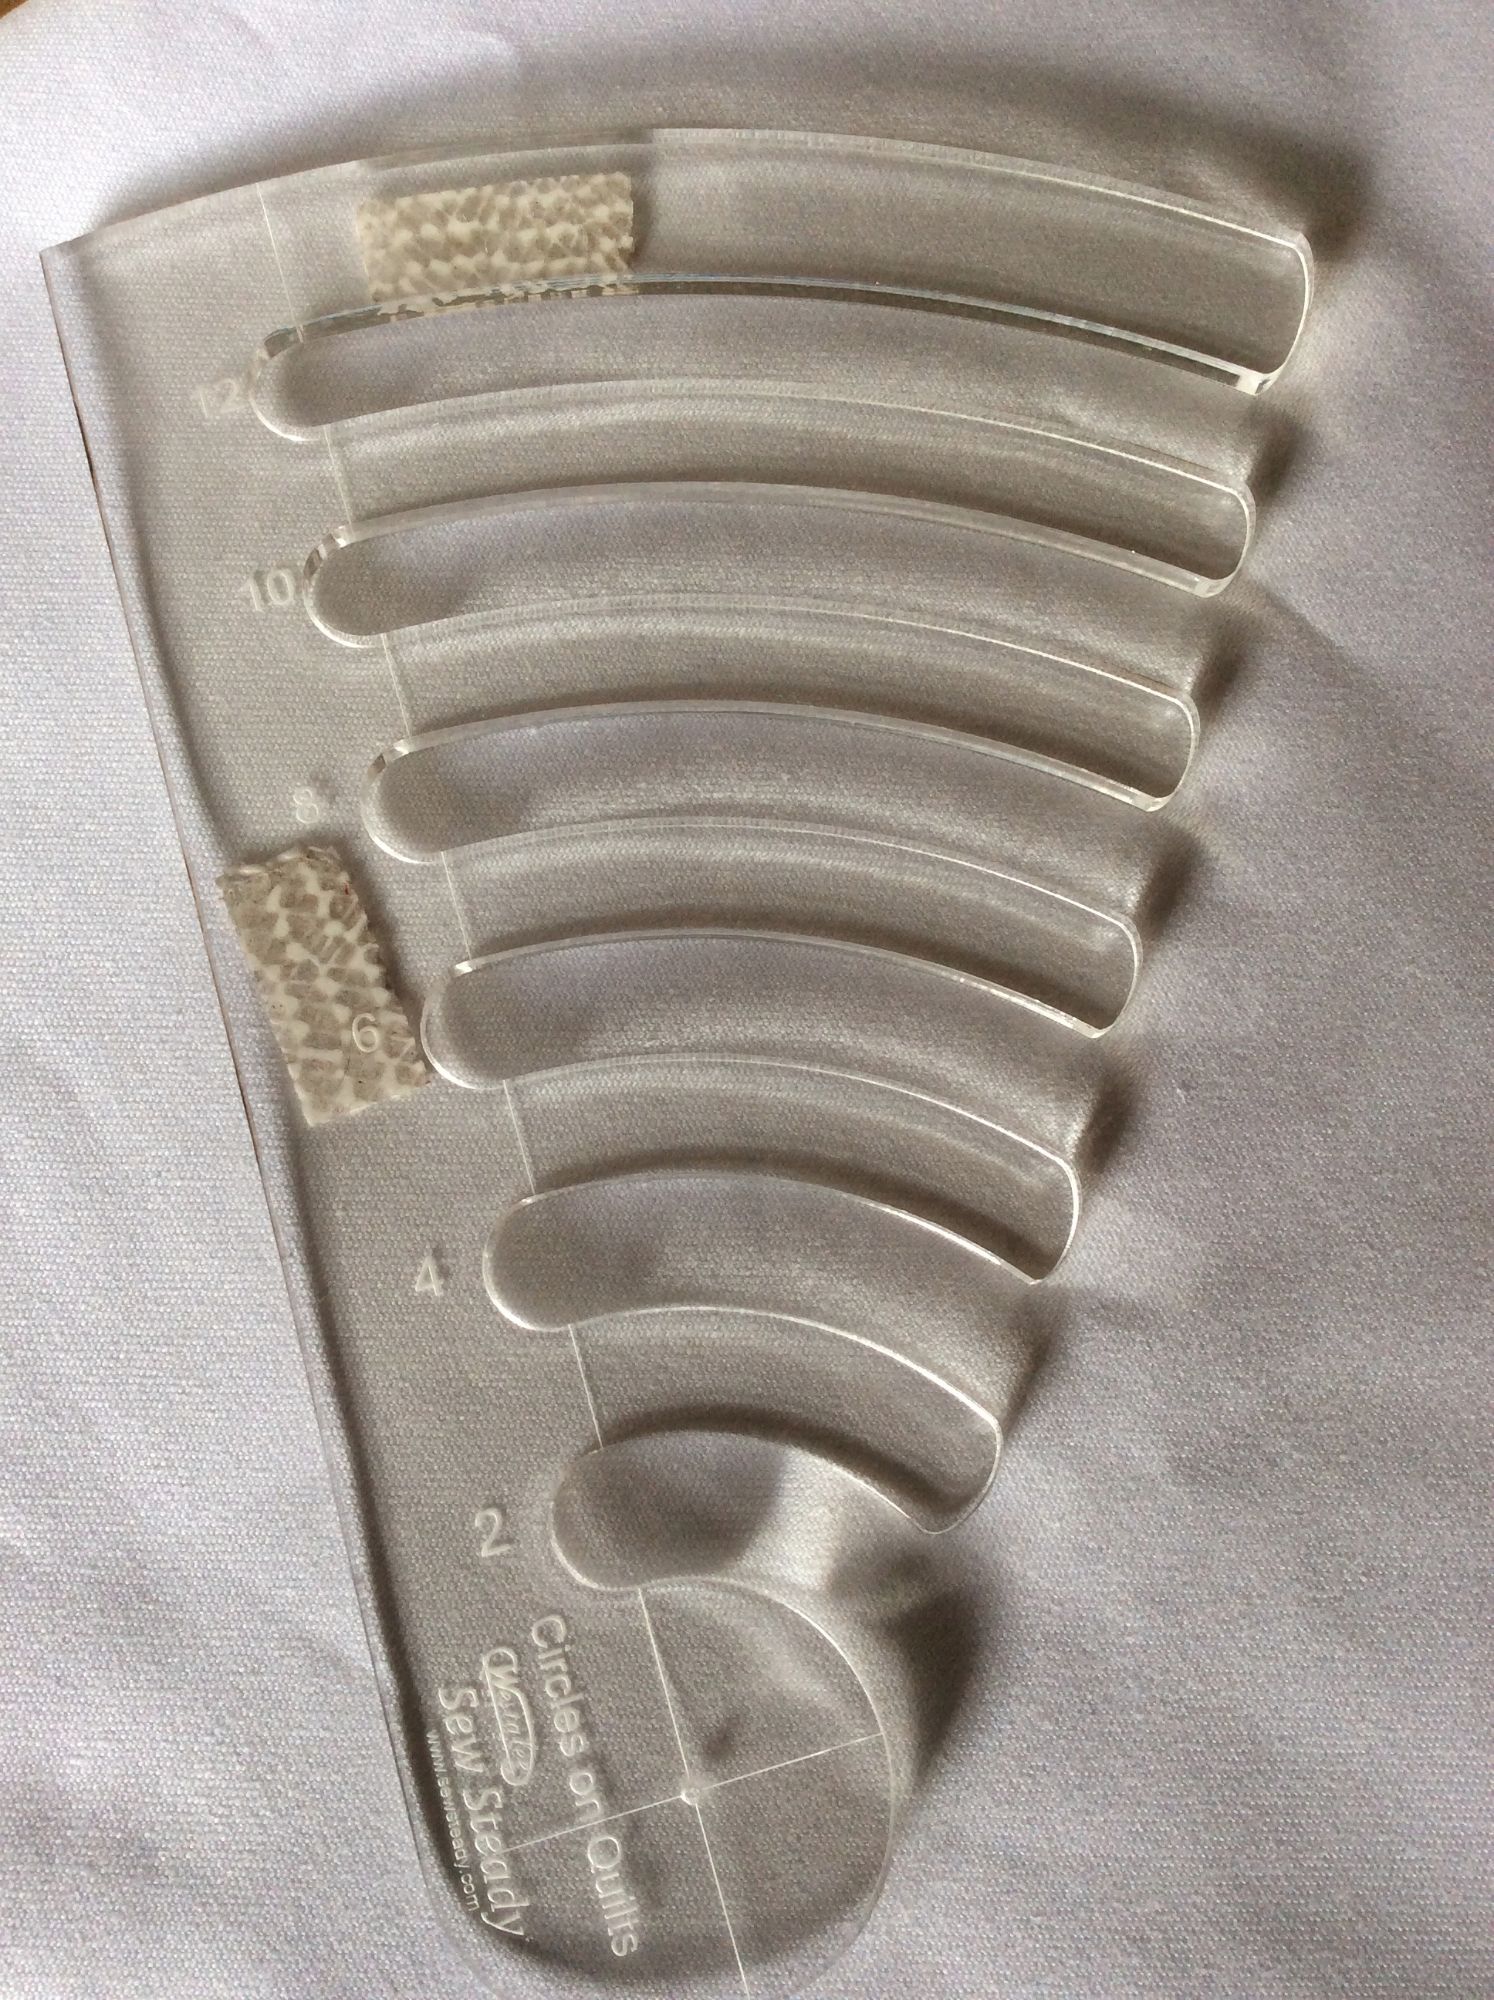
    While practising, I have come across an issue which I am working on to overcome and the problem relates to the consistency of my stitches when FMQ.  As an example, when I use the Circles template (see below) the first few stitches tend to be too close together and then the remainder of the stitches are fine until I alter the position of the template for the next section and then the same thing happens again -  the first few stitches are too close together.  I know that the speed setting is fine, neither too fast nor too slow.  The issue is more to do with over-exuberance on my part and I am working on this to kerb my enthusiasm and try not to be quite so heavy footed with the pedal!
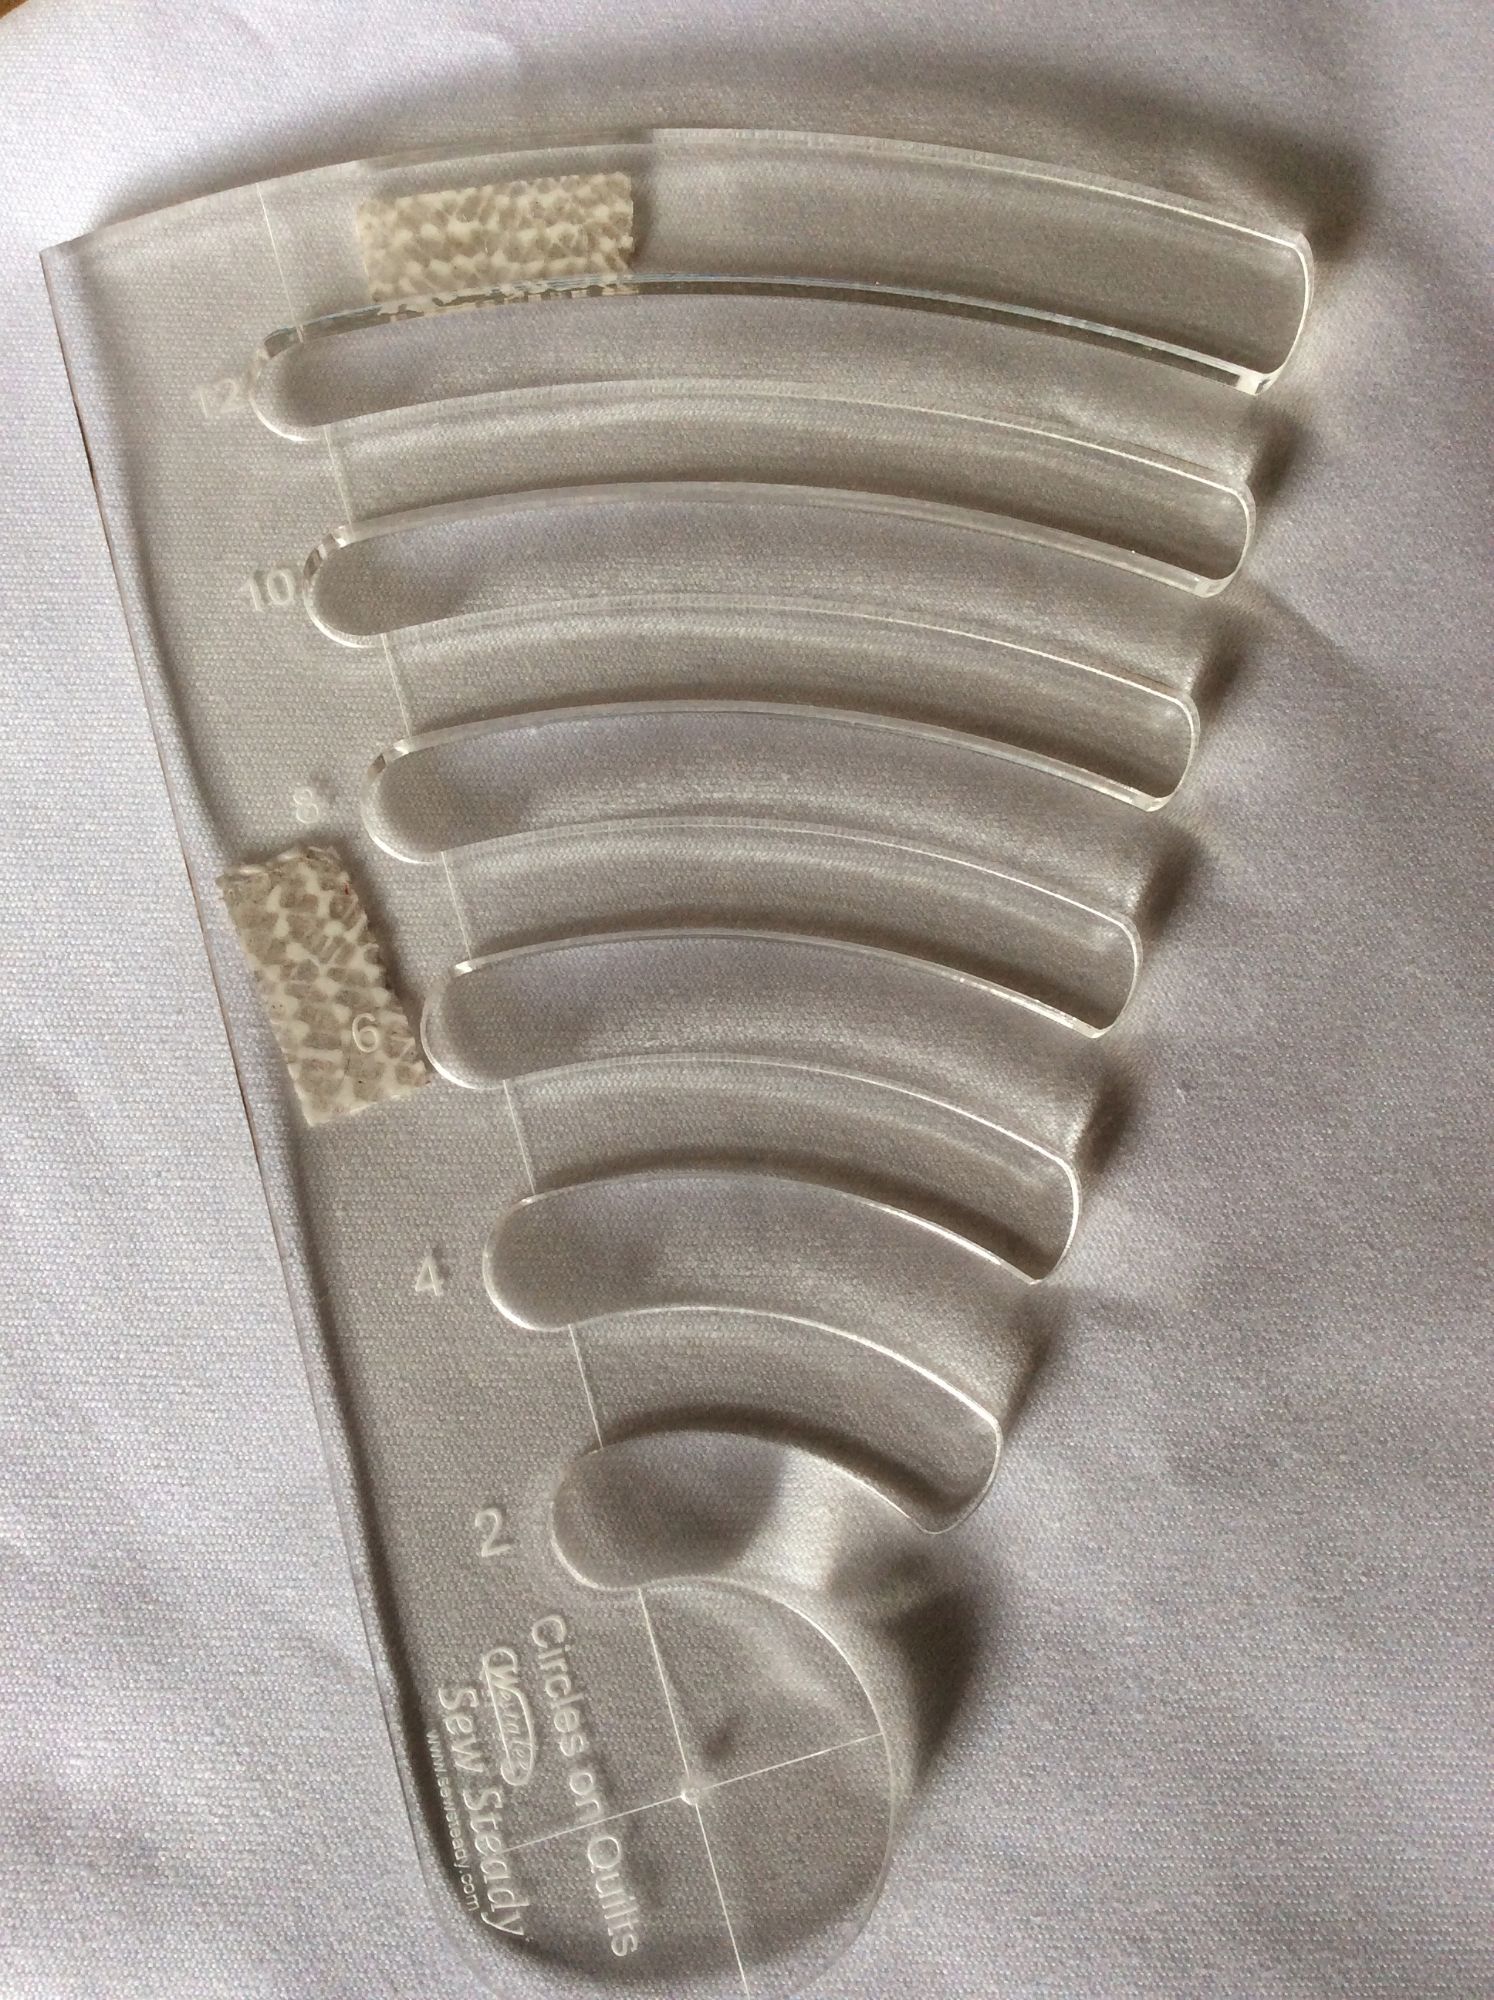
    Image 8

    Another issue that has arisen since my last blog on FMQ has to do with the choice of thread being used.  I was working on a quilt using FMQ with templates when my machine started to make an alarming banging noise and started to shudder.  I stopped sewing immediately.  The stitches on the top side of the quilt looked fine.  The thread wasn't caught up in the bobbin case.  The thread hadn't broken.  I looked at the underside of the quilt top and there I found a jumble of thread.  As the issue appeared to be something to do with the thread under the quilt I figured the problem was likely to be related with the top thread.  I re-threaded the machine.  Sewed a few stitches.  Everything seemed fine and then the violent banging and shuddering started again.  I stopped sewing, checked the underside and once more there was a jumbled mass of threads.  I repeated the process two more times and the same thing happened again and again.  I changed the needle - twice.  I de-fluffed a clean machine.  In despair I spoke to someone at my wonderful sewing machine shop where all the staff are incredibly helpful and took the machine in.  I was able to replicate the problem.  There was a lot of scratching of heads as they couldn't find any mechanical fault with the machine.  By a process of elimination we worked out that the thread I was using was too thick for FMQ even though the thread is specifically designed for machine quilting.  So should you meet a similar problem, try using a finer thread for the top - it may help.  Machine quilting thread can still be used in the bobbin.   This only applies when the feed dogs are down.  The problem has never occurred when the feed dogs are up.

    I now have a list which I refer to before I do any FMQ with templates.  Without the list I'm bound to forget something.  This is my list:

    Extension table

    -  1/4" Ruler foot

    -  Slip mat

    -  Special bobbin case (with blue mark)

    -  Quilting gloves

    -  Templates

    -  Finer thread for the top

    -  Quilt sandwiches to practise on

    -  Feed dogs down

    -  RELAX

    -  Practise, practise, practise

    -  When finished, replace normal bobbin case

    I will post some pictures of completed pieces where I've used FMQ with templates.  My practice pieces are very much work in progress.

    Happy sewing!


    Save

    Save

    Save

    Save

    Save

    Save

  2. Free Motion Quilting With 1/4" Ruler Foot and Templates on a Domestic Machine - From a Beginner's Perspective

    Posted on

    FREE MOTION QUILTNG WITH ¼” RULER FOOT AND TEMPLATES ON A DOMESTIC MACHINE – what you'll need to get started...

    This first blog is just about the ‘kit’ you’ll need to get started and more blogs will follow with tips I’ve picked up, any issues I encounter etc.  There are a lot of very helpful and informative blogs available already from people with years and years of experience of free motion quilting and so my blog will differ inasmuch as I am pretty much a beginner at this type of quilting myself.

    Free Motion Quilting (‘FMQ’) on domestic machines using templates and rulers is already popular in America and I can see why – from the very little work I've done with templates, it really is fun and there’s every reason to think that the trend will catch on in Britain too. 

    Perversely, I’m doing things back to front starting with FMQ using templates and rulers, rather than getting used to FMQ first then adding the templates and rulers. 

    Some time before I ever thought of opening an online shop I was visiting a friend who had been to a FMQ workshop a few days beforehand and I saw some of the samples she had made during the workshop.   As I had never given Free Motion Quilting any real thought, other than to admire other people’s handiwork, I had no idea what was entailed.  At that stage I didn’t even know that you needed to have the feed dogs down.  That’s how little I knew!

    Inspired by my friend’s samples, I asked if I could try.   I was unfamiliar with her machine but that's no excuse for what I produced!  I tried visualisation at first thinking I was moving the fabric rhythmically in gentle swooping motions.  That isn’t what actually happened though.  The moment I sat at the machine, for some inexplicable reason, I tensed up with shoulders hunched and whenever I started sewing I seemed to have spasms and my hands would jerk this way and that.   After my disappointing start with FMQ I decided that I needed to set aside some time to relax and practice.  In the meantime I started to watch a lot of tutorials on You Tube and it was from these that I picked up tips, which helped me understand why my earlier attempts were not particularly successful.   In fact, before I started using the templates and rulers, I had not used FMQ on any of my patchworks.  I had stuck to straight line stitching using a walking foot attachment and, when I say ‘straight line’ stitching, on close inspection, one might see a wobble or two.

    More recently I attended the Spring Quilt Festival at Exeter in Devon and saw someone demonstrating FMQ using rulers and templates and I recognised the enormous potential of using them to create fabulous patterns on patchworks.  When I got home I carried out some research to find out what was needed and realised that to use templates and rulers effectively there are some accessories that are essential and some that are preferable to have but are not absolutely necessary.    At the bottom is a list of the accessories I have bought which may help as a guideline.

    The accessories you will need will depend on your machine.  My machine is a Janome Atelier 5, which has a high shank.  It’s important to know whether you have a low or high shank machine as this will determine the ¼” ruler foot attachment suitable for your machine.  Care needs to be taken to make sure you buy the right attachment so that you don’t damage your machine.  So whatever attachment you decide to get make sure that it’s the right one. 

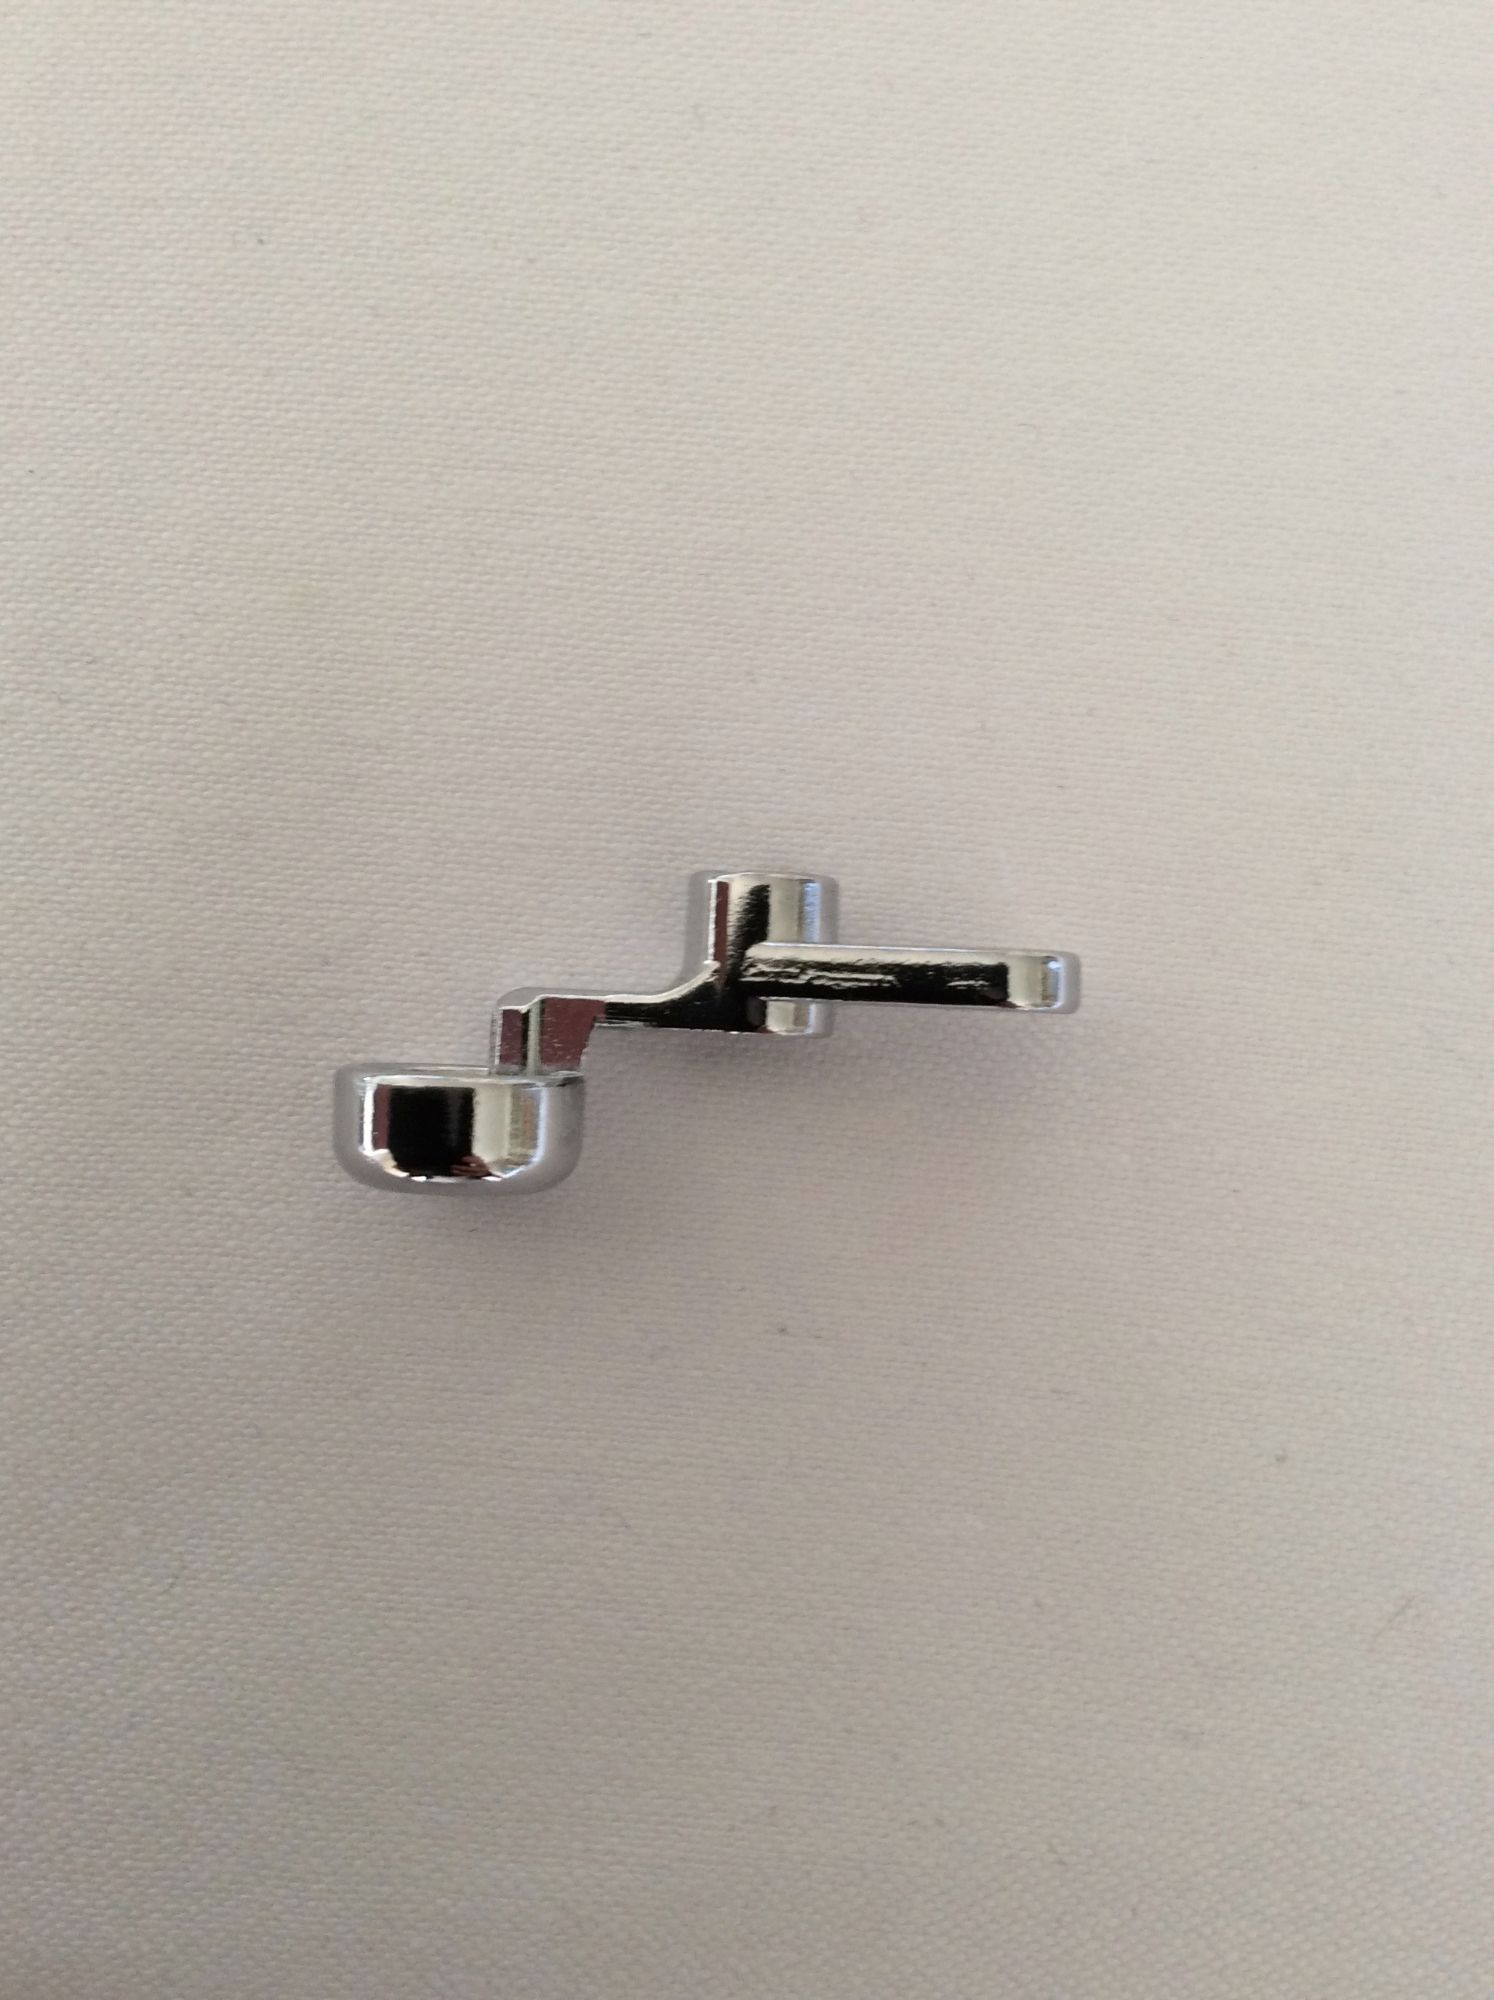
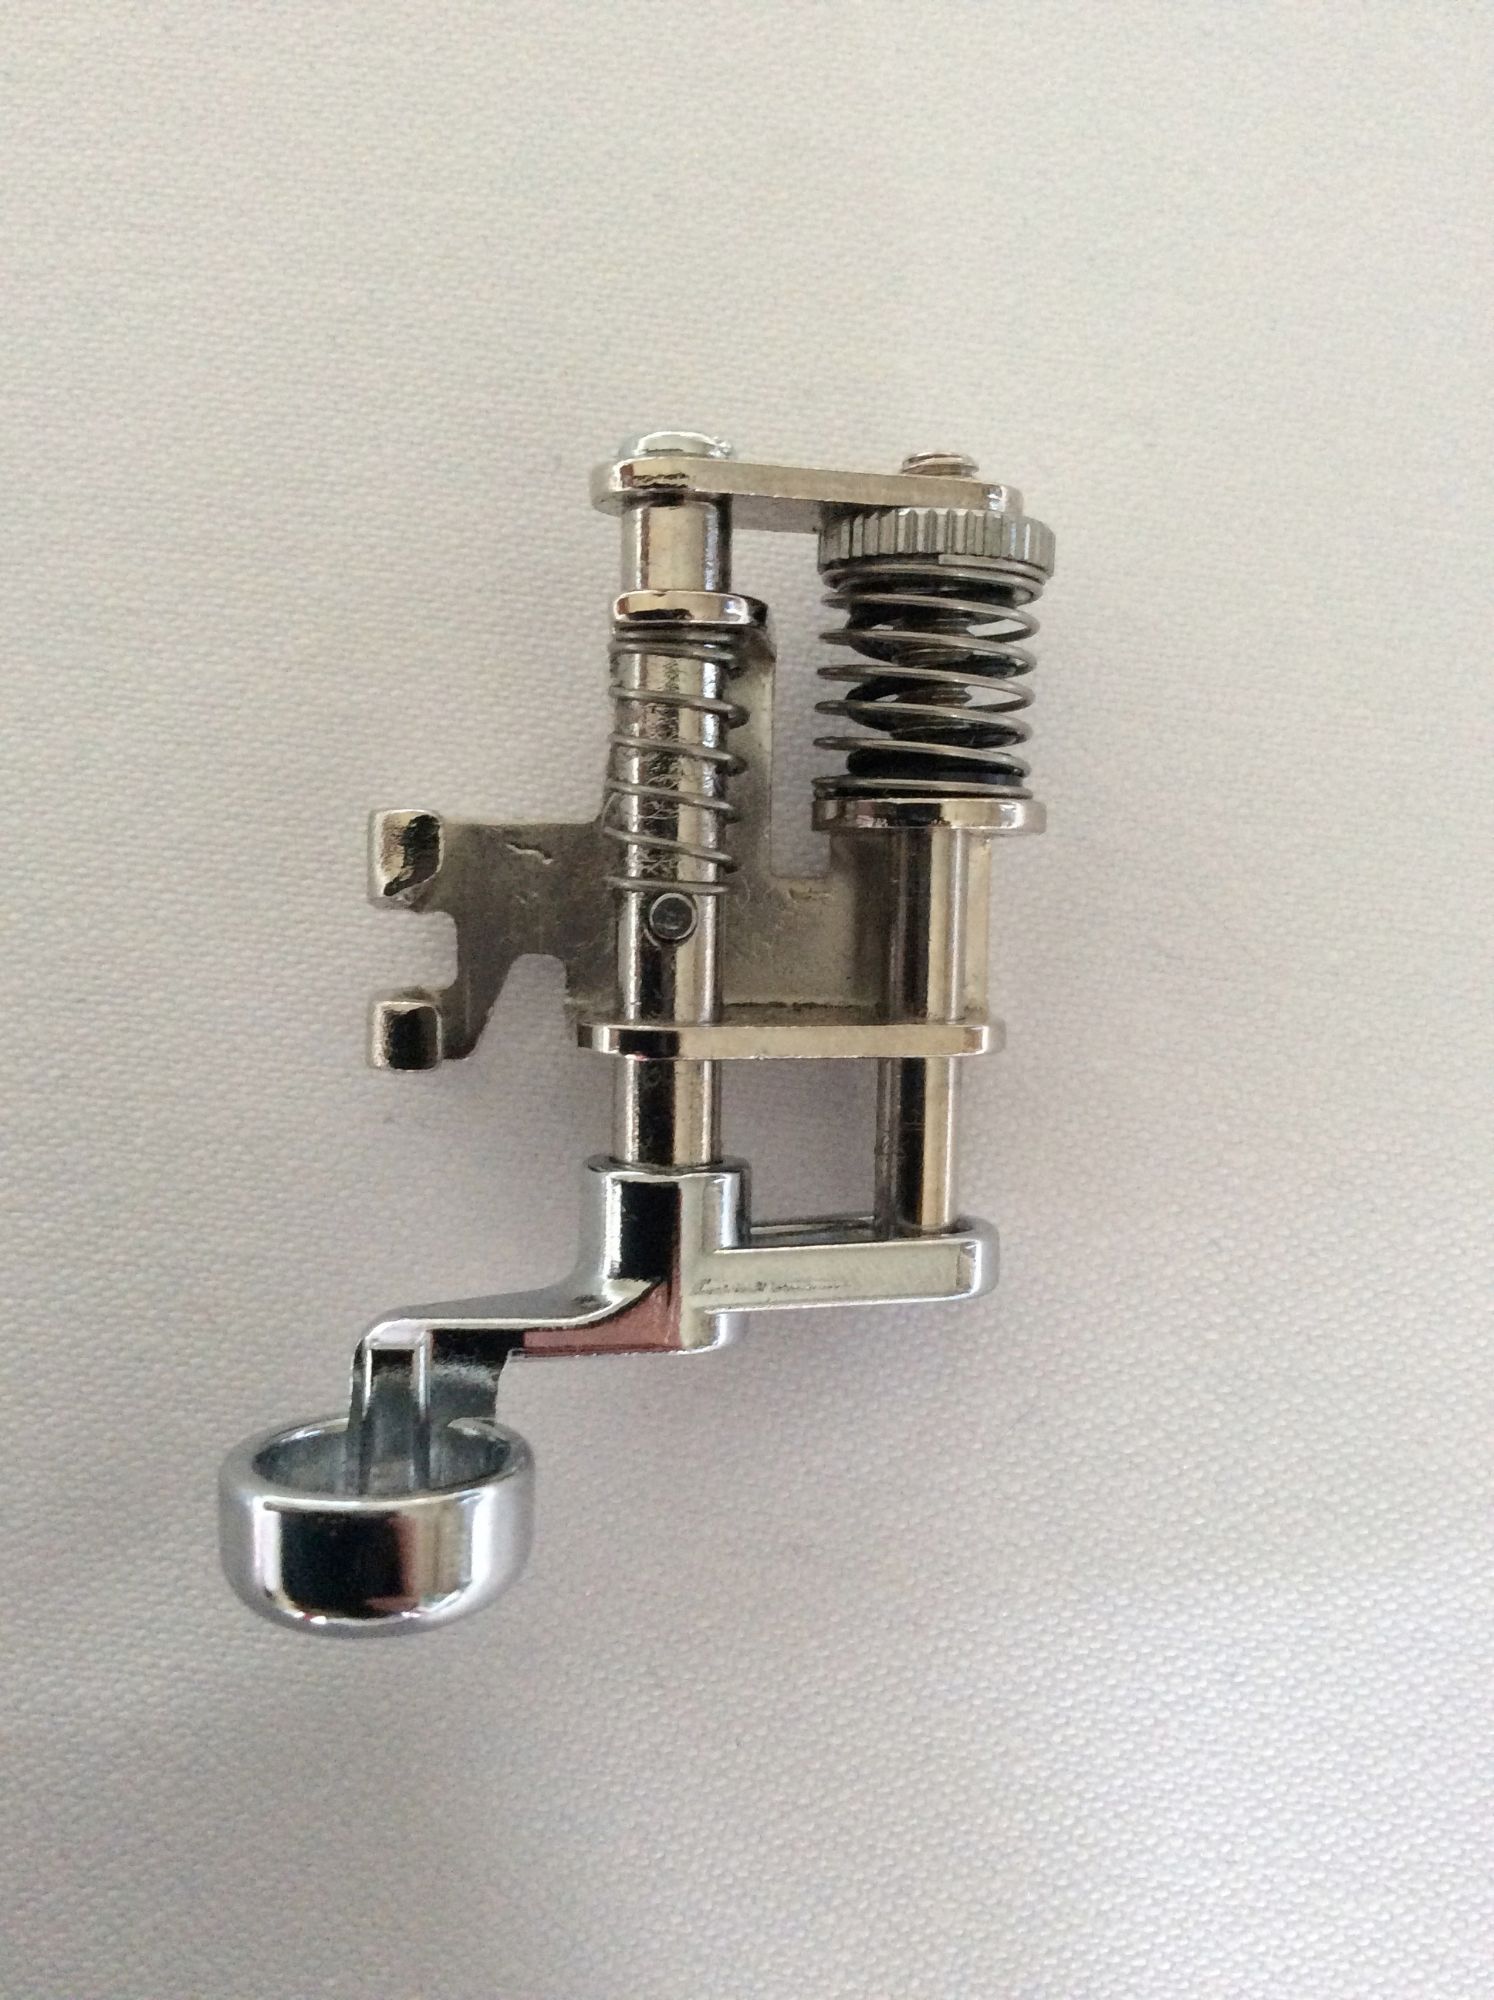
    As my Janome machine came with a ‘Quilting Kit’ including, amongst other accessories, a Convertible Free Motion Quilting Foot Set (a Foot Holder and three interchangeable feet) I decided to buy the Janome attachment.   It is the foot holder from the set that’s needed for the FMQ with templates and rulers and you will also need the ¼” Ruler Foot to attach to the Foot Holder, which I had to buy separately.  The Janome ¼” ruler foot for my machine is called a Free Motion Frame Quilting Feet Set and includes two feet (a ¼” ruler foot and an open toe frame quilting foot).  Below is an image of what the Janome ¼” ruler foot attachment looks like for my machine:

     Image 2

    And this is what it looks like when it is attached to the Foot Holder:

    Image 7

    The ¼” ruler foot has a ½” diameter and a high heel at the back and is designed to accommodate the use of ¼” rulers and templates.

    If you decide to buy a ¼" ruler foot from Westalee for example, you won't need the foot holder attachment.

    My Janome Quilt Kit also included an Extra Wide Table.  If you don’t have an extension table I would recommend getting one. Having the extra space allows you to handle large quilts more easily and the bigger the table the better.  It is now possible to get large extension tables for the vast majority of domestic machines.  

    Although I prefer not to wear quilting gloves, I found that I had much better control when wearing them.   Obviously getting a pair of gloves that fit well is an advantage.  I need to get a smaller pair as my current gloves are a tiny bit too big and I managed to sew the tip of the glove to my quilt!  Thankfully, I managed to extricate my glove with some deft snipping without damaging the quilt or machine and with no obvious damage to the gloves.  It was rather comical.

    I also discovered that a sew slip mat is a ‘must’ as you need to avoid having any ridges or ruts where the machine throat meets with the extension table.  You are aiming to have a smooth surface so that the ruler or templates don’t get caught on any uneven surface.

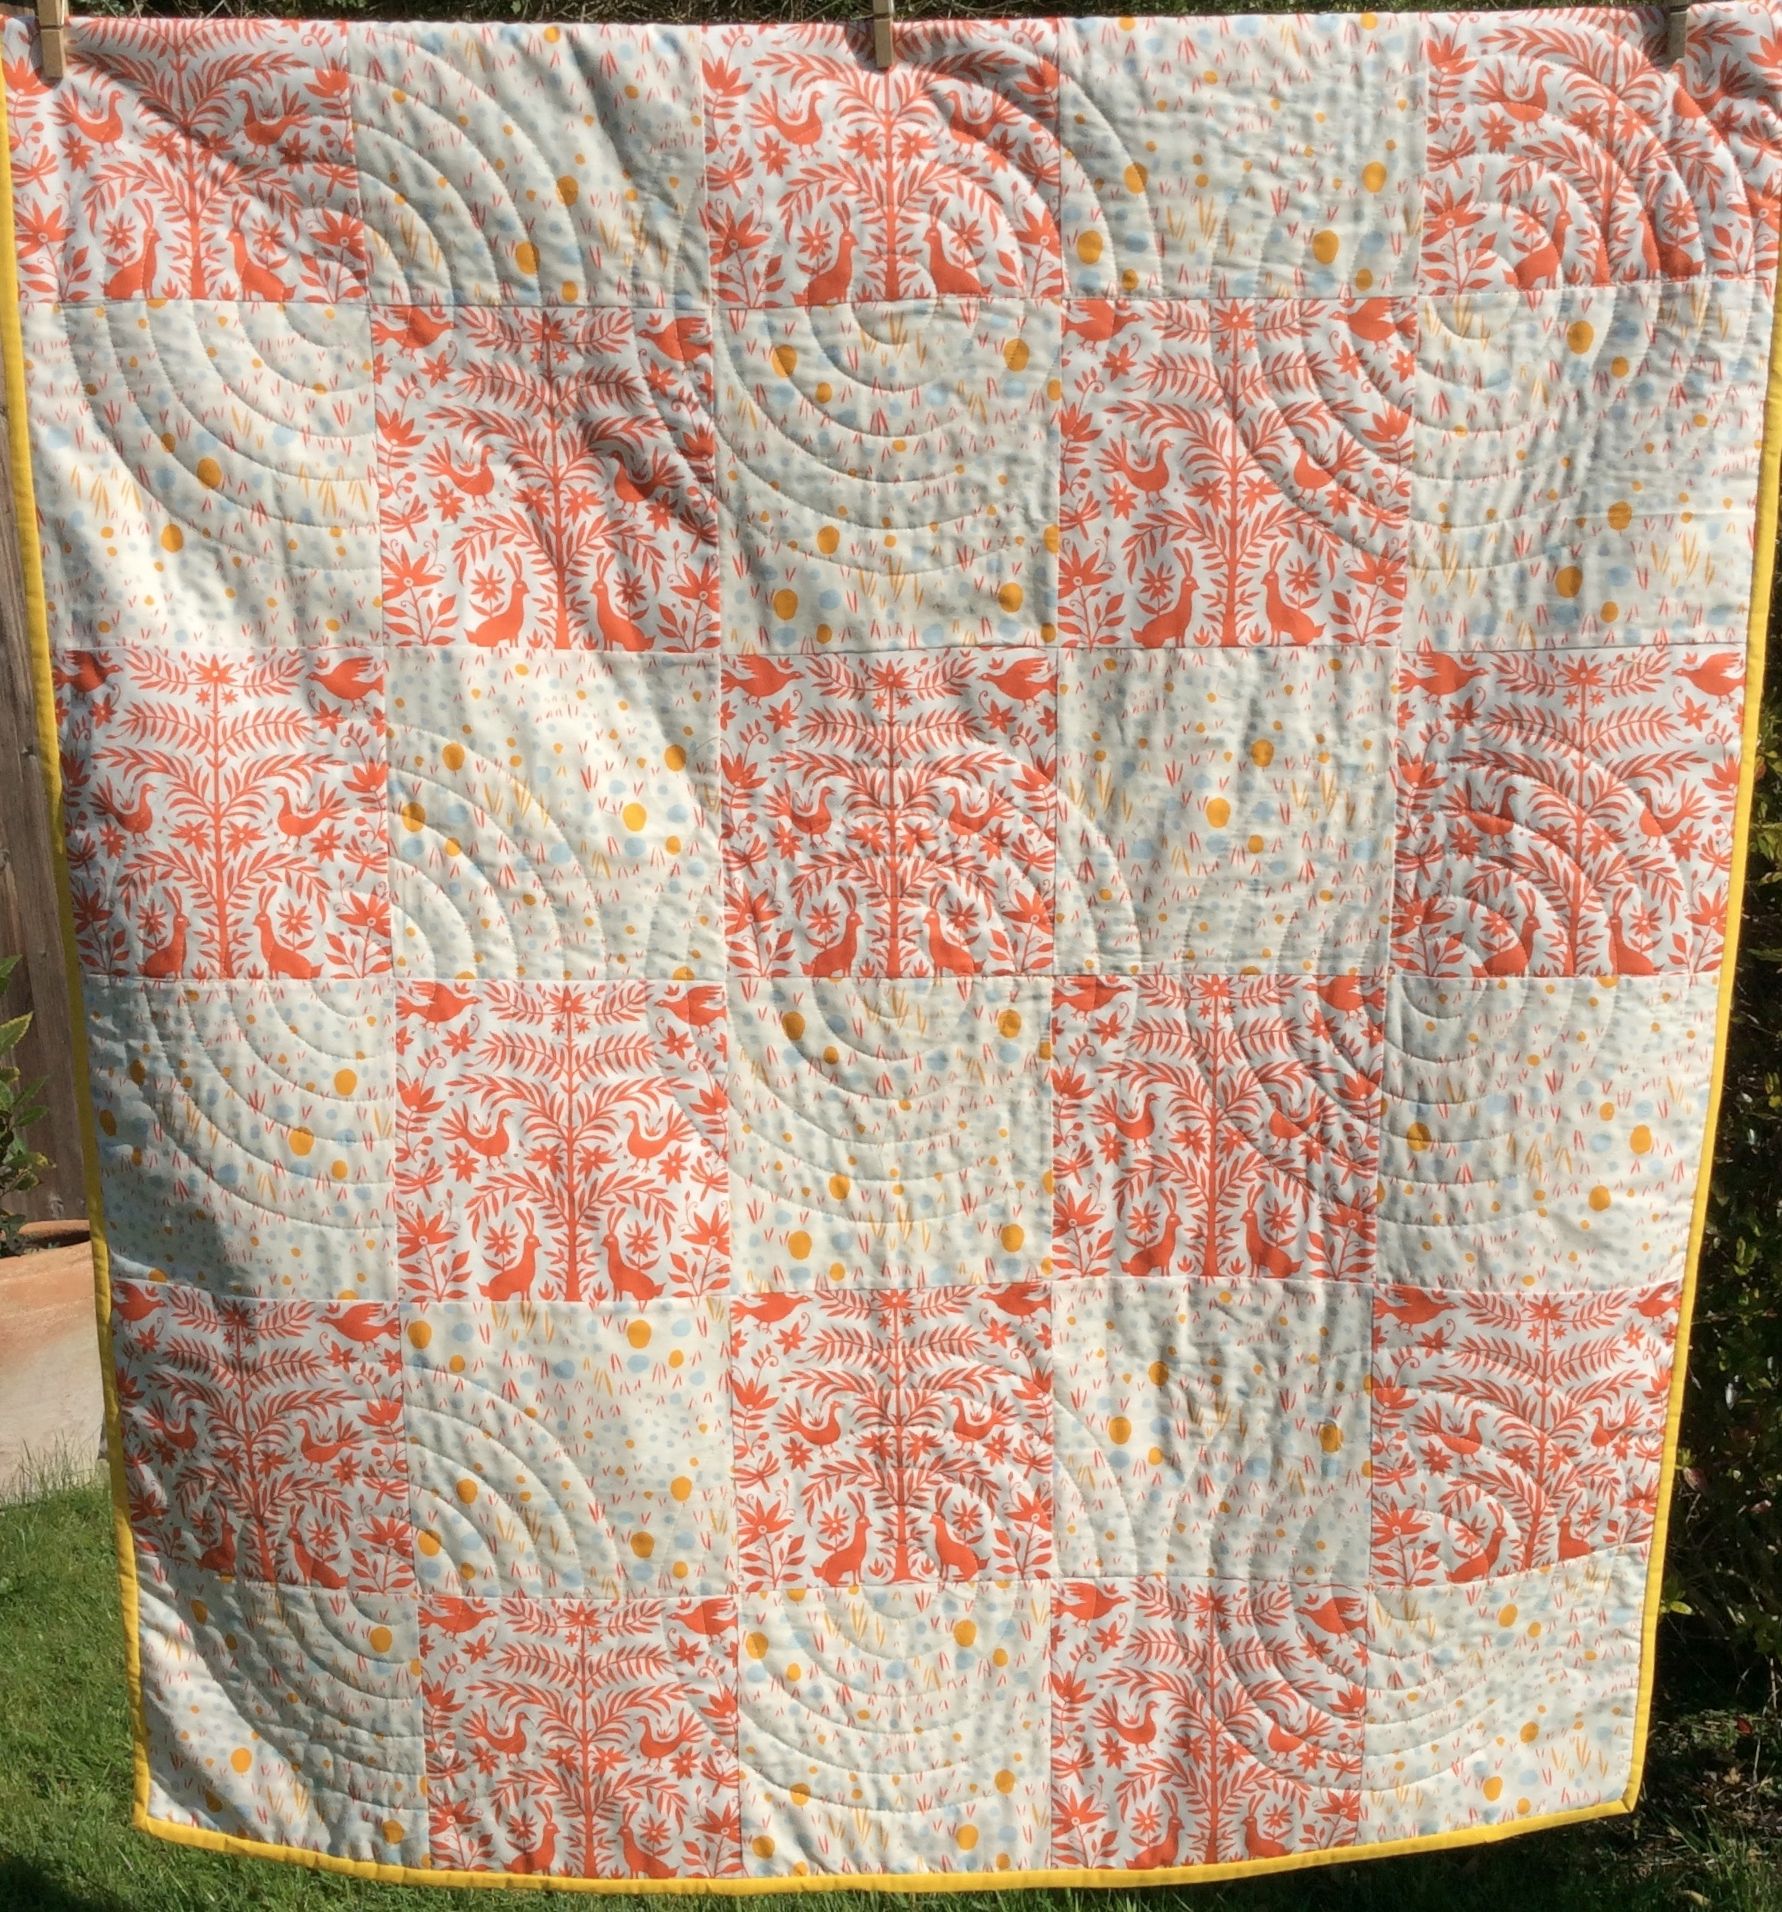
    The next purchase is a template or template set.  For the Folklore Windswept quilt pictured below I used one of the Westalee Circles on Quilts templates (this kit comes with four templates in different sizes plus adhesive strips which you add to your template to provide extra stability).  There are a lot of templates on the market, particularly abroad.  Having looked at a number of different makes I decided to go with the Westalee templates, an Australian brand.  There are a lot of You Tube tutorials by Leonie West of Westalee and I would highly recommend these. They are easy to follow and the methods are explained very clearly.   I understand there are over 200 Westalee templates suitable for use on domestic machines.   The options for creating superb designs are endless. The range of Westalee templates available in England is currently limited but I understand Cotton Patch will be stocking the entire range in just a matter of weeks.

    There are other brands of rulers and templates on the market but I haven’t tried any of these.

    Below is an image of one of the Westalee circles template I used and an image of the Folklore Windswept baby quilt I made using the template.  In my next blog I will describe my experience of using the Circles on Quilts templates.

    Image 8

    Image 1

    When I thought I was fully kitted out I discovered that the tension on the bobbin needs to be adjusted when doing FMQ.    Now I know this, it explains why my early attempts were ‘okay’ but not brilliant.  With the alteration on the bobbin tension the difference to the quality of the stitching is really noticeable.   Adjusting the bobbin tension can be done manually.  However, I didn’t want to run the risk of not being able to reset the bobbin tension when reverting to straightforward sewing. Therefore, I decided to splash out and buy a bobbin holder specifically for FMQ (I didn't even know such a thing existed until recently).  I feel as though I’ve been ‘splashing out’ a lot lately.   The acquisition of the special bobbin holder is worth considering if you are planning to do a lot of FMQ.  On my Janome Atelier 5 the ordinary bobbin holder has a red dot and the FMQ bobbin holder has a blue dot to help you identify which is which.

    My list of accessories for FMQ with rulers and templates on a Janome Atelier 5:

    Necessary Accessories                        

    • Slip mat                                
    • ¼” Ruler Foot Attachment (high shank)
    • Extension Table
    • Rulers and Templates

    Optional Accessories

    • Convertible Free Motion Foot Holder (high shank).  This is optional as you won't need this if you opt for a ¼" ruler foot that has been designed to be attached without a foot holder.  As I already had the Janome Quilting Kit with the foot holder attachment I chose to buy the Janome ¼" foot attachment.
    • Gloves
    • Bobbin Holder for Free Motion Quilting

    Visit my website again in three to four weeks for the next instalment on FMQ using templates and rulers including the template I used on the Folklore baby quilt.

    I hope you've found this blog helpful.